
Open Side
My friends and my siblings and I had often built simple, relatively square bags out of lightweight plastic, filled them with hot air and/or a heat source and set them adrift. The activity was usually entertaining, and due to the unstable designs we often launched, sometimes quite terrifying. The thrill of watching a dry-cleaning bag fly was often dampened by embarrassment at the unstable and unsightly shape of the object in flight. The software I'm selling here, and the instructions that follow, are the result of my attempt to keep all of the fun, some of the danger, and none of the embarrassment. If you're going to do something, why not do it right?
To understand the basic process, imagine you have the tiny panels for a one foot tall balloon, made of paper, in front of you. If you simply try to join the appropriate edges together, you quickly develop a 3 dimensional structure. This makes construction really difficult. Now, imagine folding each panel in half along its centerline. If you lay one folded piece on top of the next, the edges can be lined up FLAT, at least until you add the last piece. That's what we're doing, joining the panels folded along their center line.
Run my Balloon32 application: If you don't have it, you can buy it here for $5.00. If you don't want to spend $5.00, maybe you can find a pattern you like here. The more panels you use, the longer your panels will be for a given panel width. The more panels you use, the bigger around your balloon will be for a given width. The more panels you use, the more work you'll be doing to complete the balloon. I'd recommend you do a 6 panel balloon first, just to get an idea how much work is involved.
If you're using a pattern, instead of the software, skip ahead to the next paragraph. If you're running my software, for your first balloon, select "Guide Circle" from the Tools menu. This will draw a gray circle in the "Design Panel". Thinking of the circle as a clock, left-click the circle at about the 11:30 mark, then 11:00, then 10:00 down to about 8:00. Then click about a mouse pointer to the left of the center line, well below the bottom of the circle. It's really a free-hand design, so if you don't like it, right-click the design panel to start over. When you like your shape, save it (File/Save) for future reference.
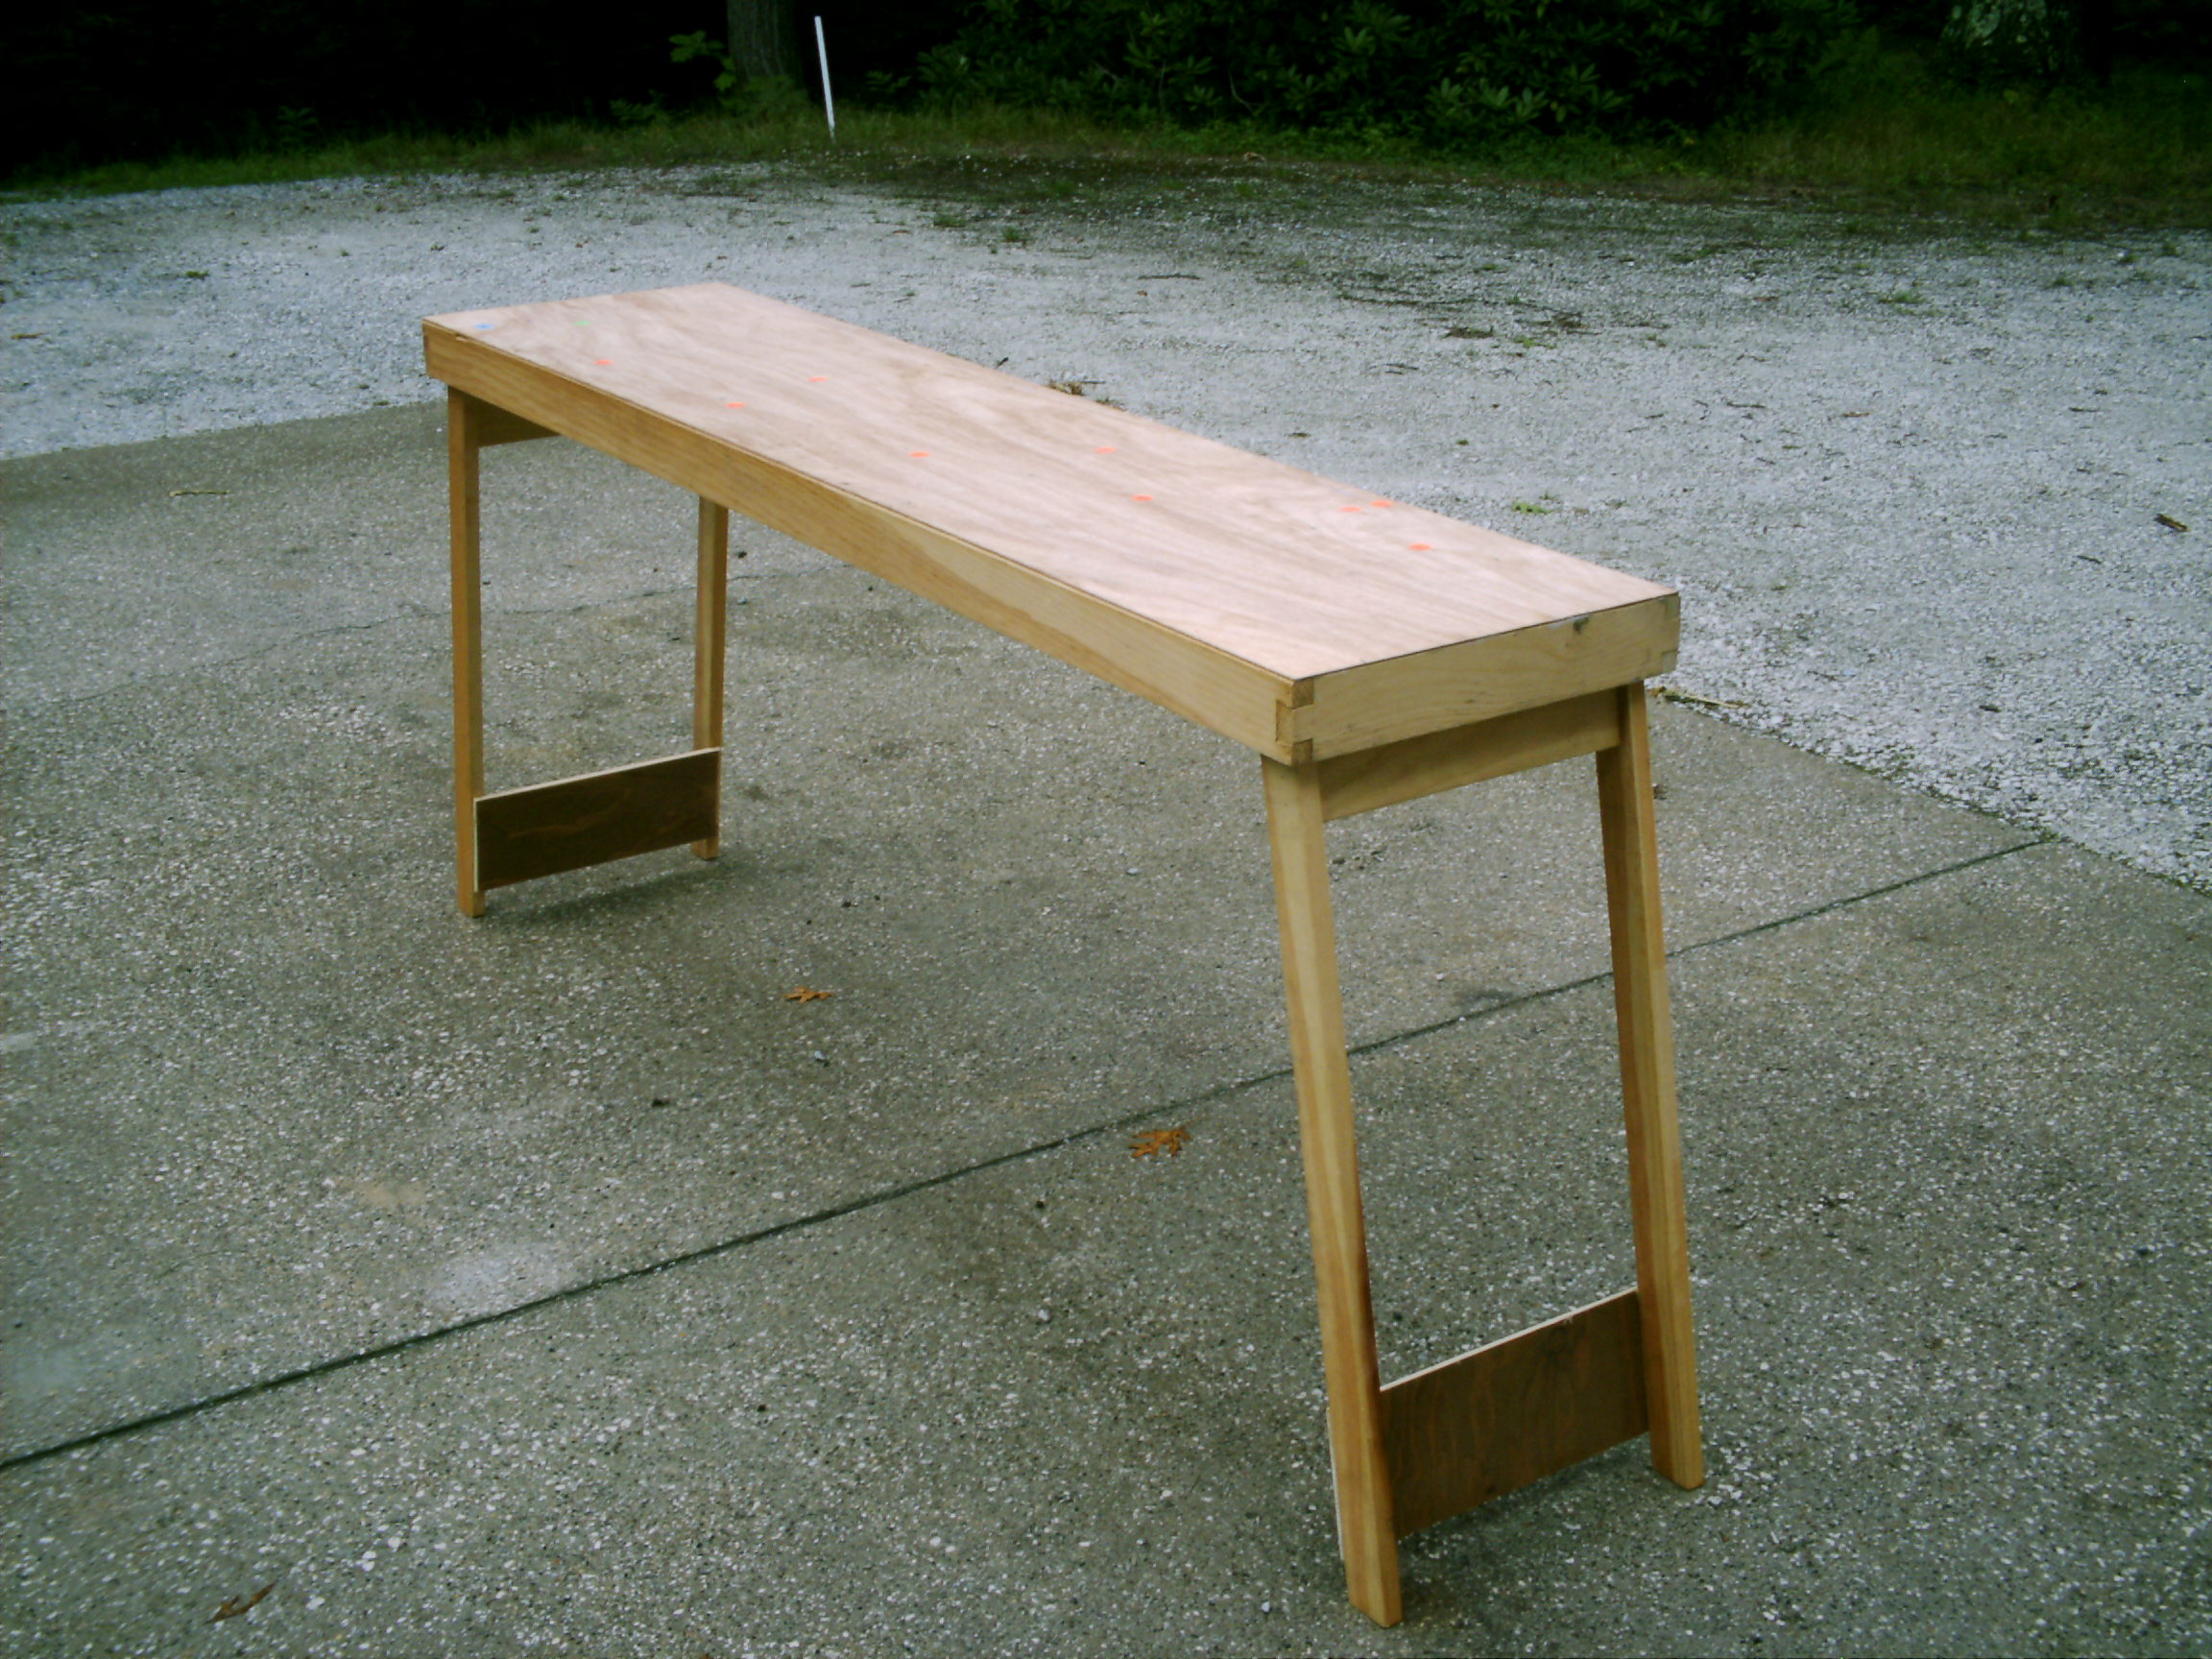
My secret to building a really nice looking drop cloth balloon is having or building an appropriately proportioned table. I built three 33" high, 5' long, 16" wide, light weight, wooden tables. I doubt I spent 5 bucks each to make them, but they are, like the Visa commercial would say, priceless. The table top has to be somewhat tolerant of heat, and you should be tolerant of the fact that the tops will eventually become scorched. In addition to the tables, I built a couple boxes that can be clamped between the ends of the tables to yield a continuous work area up to 17 feet long. If building custom tables just for ballooning is out of the question, you can do this on any large heat resistant surface. Erect or prepare your table or tables, and if you have more than one, pull a string to make sure you're at least close to straight. From here on out, regardless of how many tables you actually have, I'm going to refer to it as "the table".
Print out a pattern sheet. Select "Print Pattern Sheet" from the "File" menu. The build sheet will print to the default printer. When you're asked to "Enter Width of Full Size Material In Decimal Inches", you're really putting in the panel width. The "panel width" is how wide one panel is at its widest point. You will need a panel width that is less than twice the width of your table. You'll want to use a 'panel width' such that this width times some small integer is just less than the width (or length) of your raw material. I use 9' wide drop cloth from a 400' roll, If I use a panel width of 26", I get 4 full panels, and 4 inches of scrap from the 9' (108") width. It's good to plan on some scrap, or you'll invariably come up short, and have to splice in mid-panel, which is just as much work as adding a panel, and the extra seam makes the balloon less aesthetically pleasing. You want to make sure that the last measurement for "Y" location is less than the length of your table, and less than the length of your drop cloths. If you are using rolled material, you only really have to worry about the length of the table. In any case, if you find yourself limited by the length, and not the width, you can reply to the prompt for the width of your material with "L=###" where ### is the length you want in inches. The program will calculate the width that would get you exactly the requested length.
With the build sheet in hand, pull a tape measure from one end of
the table, and using a framing square located at the "Y" location,
put a small sticker on the table at the "X" location, measuring along
the framing square from an edge, or if you prefer, a chalkline.
I like to put a sticker at 0,0 and at the reference edge at the final
"Y" location. It makes lining up the panels easier.
Your table should look something like this:
If you're using rolled material, pull out a piece long enough to go from one end to the other. Unfold the material with just more than a half-panel worth hanging down over the open side and the extra material hanging over the closed side. The "half-panel worth" hanging over the open side will be joined to the final panel, so make sure it's not too short. Make a few marks with a sharpie to indicate where it was over the reference edge. Pull a string parallel to the edge of the table, just past the widest point, clamp it in place with some tension on it and fold the extra material back over it to hang over the Open side. Put a few weights on the material to keep it in place. I usually clamp the tip of the balloon and the bottom edge to the table. Place a two or three foot length of waxed paper over the dots, and with a soldering iron and a straight edge, connect the first few dots. Try to make as continuous a line as possible. Move slowly, you want to melt the plastic and squeeze a line of it out from under the soldering iron. This will seal AND cut the material. It will take a little practice, but you'll get plenty. Carefully peel the waxed paper away, holding the "good" side down, and see if the scrap portion can be pulled away.
Leave the 'good' part stuck to the table for now, it's easier to handle that way. When you're satisfied that you've got the technique down, continue to connect the rest of the dots. Don't connect the last, bottom dot to the dot at the edge of the Open side.
With an indelible marker (Sharpie), mark a few lines along the open edge reference line, so you can line up the next section. Peel the finished work from the table, and get your string out of the scrap plastic. Hang the finished portion along the open edge and the extra material over the closed edge, lining your Sharpie marks up with the reference edge. For really large balloons, you'll want to provide support to hold the finished portion such that it doesn't pull the unfinished work off of the table. Repull the string, fold the material and cut/seal the next panel. Don't forget to put a few sharpie marks on each panel along the reference line. You'll need the marks to align the panel for the next seam.
When your unused material isn't sufficient to go around the string and still hang over the open edge by at least a half panel, leave it hanging over the closed side, and start a new piece, with one edge of the new piece just beyond the widest point and most of the new material hanging over the open edge. You won't use the string for this joint.
If you're making a 6 panel balloon, then you'll be making 6 seams. If you've made 5 then the next seam closes the balloon. So, rather than folding the material back over the string, line up the first panel and the last panel with the marks and seal/cut just like the first 5. You don't need the string for this final sealing.
When I did my first few balloons, the top was really ragged, but I found that if you twist an inch or so of it up and cut it off with the soldering iron, you'll get an okay seal.
Inflate the balloon carefully with a blow-dryer. Keep it on a cool setting until the balloon takes a stable shape. Patch any mistakes with cellophane (scotch) tape. The balloon is very fragile, so handle it with care, and don't let your cat see it.
The balloon gets its lift from a group of birthday candles mounted in a "fire box". This fire box mounts onto a "fire platform" for the flight. The two pieces are separate to allow for a quick installation of the fire box once the candles are lit.
Building the fire platform is relatively easy if you have a few tools. Cut a quarter inch long piece of broomstick. Drill 3 or 4 evenly spaced 7/64" holes into the side of this body. Drill a 1/4" hole, top to bottom, through the center of the body. Cut a passageway centered between two of the 7/64" holes, about 1/8" wide, making the body look a 'C'. The 'spokes' of the fire platform are made of bamboo shish-kabob skewers. Push the ends of your spokes through a 7/64" hole in a drill gauge, or clean them up with a pen knife so that they fit snugly into the holes in the fire platform body. Glue them in with either white glue or wood glue.

I like to leave the fire platform detached until I'm in the field, so it doesn't get broken. Each skewer is attached to the bottom edge of the balloon opening with a small square of all-purpose gray (duct) tape.
The "fire box" holds a number of birthday cake candles and will be mounted onto the "fire platform". The bigger the balloon, the more candles it will take to keep it aloft. The balloon program will help you create a pattern that is axially symmetrical. Pull down the Tools menu in the Balloon application and select Candles. Start with:
Count=1, Drill=0.1, Radius=0, Offset=0 [Add].That gives you the drill hole for the handle at the center of the box. Add a few circles of candles:
Count=3, Drill=0.2, Radius=0.25, Offset=0  [Add]
Count=3, Drill=0.2, Radius=0.45, Offset=60 [Add]
Count=3, Drill=0.2, Radius=0.65, Offset=0  [Add]
Now you have 9 candle holes. Do a final
Count=3, Drill=2.7, Radius=0.65, Offset=0 [Add]to get arcs to cut on. You'll get a lot of extra arc drawn, but you've got a brain, just ignore what doesn't make sense.
Cut out the pattern and glue it to a piece of 3/16" thick, lightweight wood. Cut out the fire box along the arcs. Drill the center hole all the way through with the 7/64" bit. Using a drill that matches the size of your candles as closely as possible, drill ALMOST through at each candle location. Glue a 4" piece of bamboo skewer into the center hole. It should stick out the bottom, whereas the candle holes are in the top. Wind a 1/4" wide piece of duct tape around the handle, right below the wood. Do two or three layers. The wrapped portion of the handle should fit easily into the center of the fire platform, but not fit through the passageway.
Install a birthday candle in each hole. It helps to warm the bottom of them up to make them pliable. If they're melted just a bit, they'll hold on to the platform quite well.
The firebox is installed by passing the unwrapped portion of the handle through the cut passageway, and lowering the wrapped portion into the eye of the body. An impaled piece of paper or another piece of tape slid up the handle will secure the fire box into the platform. This can be done quickly, with the candles burning. Practice it a few times though, when they aren't lit.
Unless you go REALLY big, these balloons don't fall under FAA jurisdiction, but you should read the restrictions on unmanned free balloons anyway, and check local regulations, and use some common sense. These balloons should only be launched on relatively calm, cool days. They are all but unmanageable in the slightest of breezes, and the cooler it is, the easier it is to get the balloon to a "liftable" temperature.
Attach the "fire platform" inside the mouth of the balloon with small pieces of duct tape. Be careful, the tape can seldom be removed from the skin of the balloon without damaging it, so get it right the first time.
Using a hair dryer, or some warm air generating device of your choosing, fill the balloon with warm air. The hotter you can get it, the better, within reason of course, but you'll want to start out just warm to avoid scorching the fragile plastic and turn up the heat when the balloon is full. When the balloon has assumed a stable shape, with at least enough heat to lift the additional weight of the candles, light the candles and install the firebox into the fire platform. Secure it with some duct tape.
You NEED to follow the balloon at least until it is way higher
than any obstructions it might conceivably hit and the candles are out.
You SHOULD follow it until it lands, if possible.